This repository serves as examples for code to be used in Raspberry Pi Pico projects.
- Example 1 - Blink an LED
- Example 2 - Control an LED with a button
- Example 3 - Using a potentiometer
- Example 4 - Using a HC-SR04 Range finder
- Example 5 - DHT11 humidity and temperature measurement
- Example 6 - Connecting to Wi-Fi and webscraping
- Example 7 - Connecting to an MQTT Broker to send messages
- Example 8 - Combines all previous examples into 1 program
The Demo box code is my personal development for testing out new features to add to the above examples list and demonstrating new features.
If you do not have access to any of the hardware please refer to the section below regarding the Wokwi simulator
The Raspberry Pi Pico is a micro controller produced by Raspberry Pi.
You can read more specific details about the device here: RPI Pico Series Official Documentation
For versioning and compatability please note this was all developed on and for MicroPython v1.25.0 on 2025-04-15; Raspberry Pi Pico 2 W with RP2350 unless otherwise stated
Below is the Pin Out Diagram for the model used

There are a number of items you will need to complete these exercises.
- 1x Breadboard
- Also referred to as protoboards, devboards etc these are boards that require no soldering and allow for quick and easy building of circuits (kinda like an electronic lego base plate)
- 1x Raspbery pi pico
- See above for details on the pico
- 1x LED
- LED stands for Light Emitting Diode. These are small handy lights that always add a bit of pizaz to any electronics project. You will need 1 but can get creative with examples showing the use of up to 4 differnet colours
- 1x 220Ω resistor
- A resistor restricts the flow of current and helps us to control how much goes to a component/circuit. You will need 1 of these resistors for each LED you plan to use
- 1x Button
- The button used is a simple electronics button. Again you only need 1 but the examples will show how to use up to 2
- 1x Potentiometer
- A Potentiometer is a form of variable resistor that you can control the value of by turning it up or down (like the volume on a speaker). You will need 1 of these but the project shows how you can incorporate upto 3.
- 1x DHT11
- The DHT11 is a humidity and temperature sensor that is commmonly used in arduino projects
- 1x Range Finder
- The Range finder we are using is a HC-SR04 a super common bit of kit used for detecting distance or presence

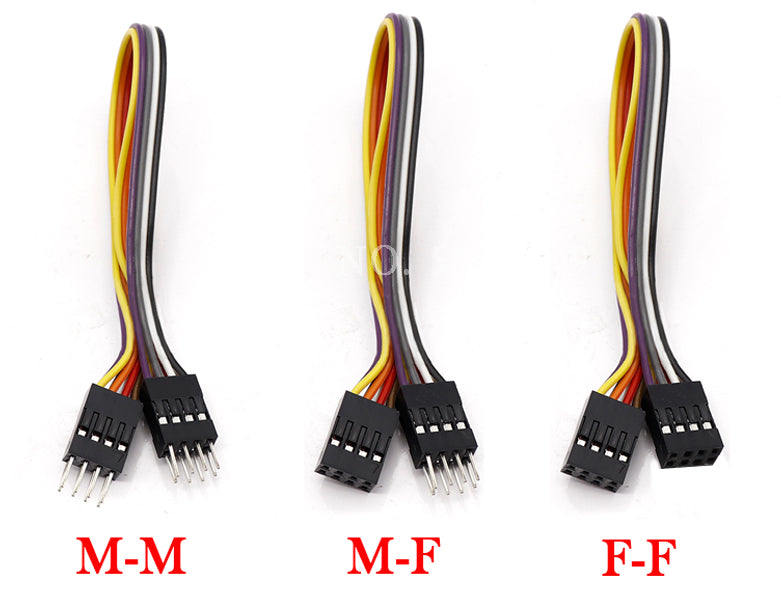
When building the circuit while the breadboard can facilitate most of the connections you will need to use some wires. You can use any electronics wire however for projects like this I like to use Jumper cables, or jumper wire, as like the breadboard, these allow for ease of connection without soldering. there are 3 types Male to male (M2M), Female to Female (F2F) and Female to Male (F2M). For this project we will primarily need M2M if youre keeping everything on the board but feel free to use various combinations if youre mounting components/build into project box.

- Image taken from here
If you do not have access to a Pico, the components or have the ability to install and run the MicropythonIDE listed you can use Wokwi.com.
Wokwi will allow us to simulate the hardware aspect of this course. Like with all projects remember to save your code regularly!!!
There will be examples for Wokwi in each of the mini projects but to get started you can go to the link here Base Pico Project for the base project and create a copy for yourself.
I am integrating the above code with a Mosquitto MQTT broker and a web based dashboard using NodeRed all hosted on my Raspberry Pi 5.
The code for setting up both can be found in my raspberry pi base installers script under the followng headings:
- "# Install Mosquitto MQTT Broker"
- "## Installing nodeRed"
If youre looking for help/examples for building your workflows/configuring your NodeRed dashboards
you can jump over to raspberry pi base installers script for a few examples